FRITZ!Box 7390
The FRITZ!Box WLAN 7390 is a (EoL) router with built-in telephony support.
Configuring a HoIP account in its PBX allows you to then use any other telephony device (POTS, DECT, SIP phones, ...) to use and react to it, with a Preselection prefix if desired.
Configuration
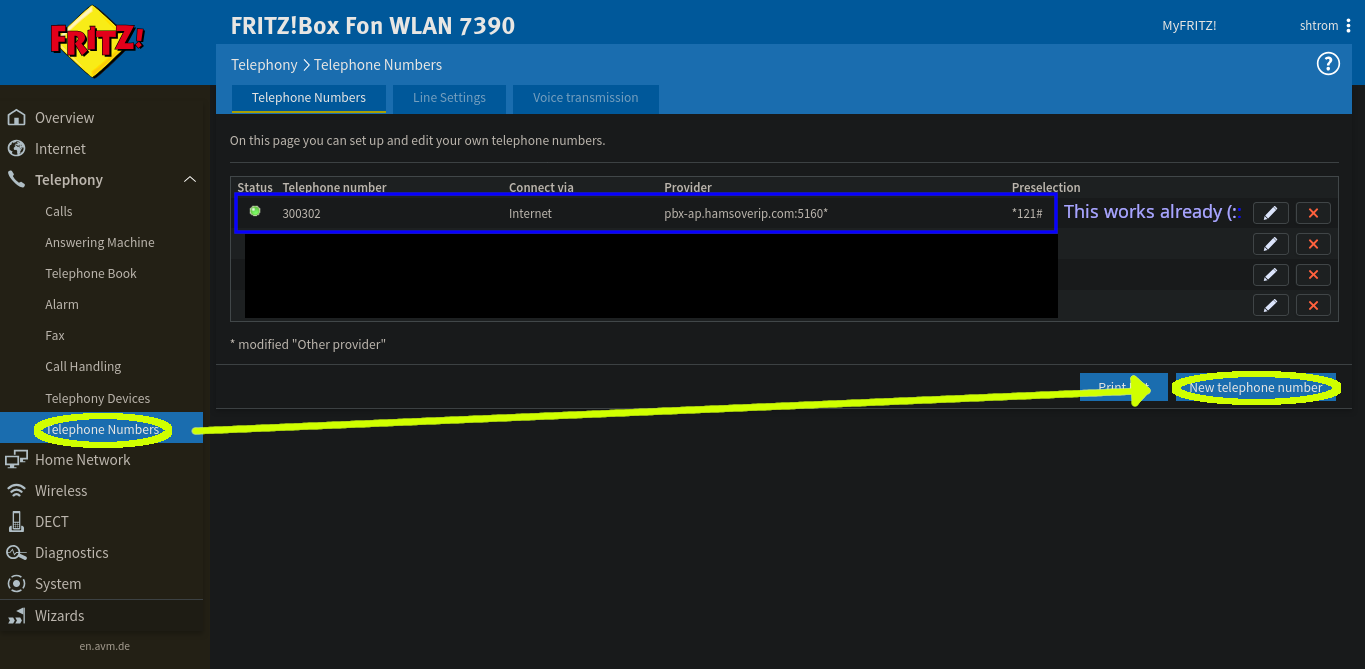
- From the main admin page (generally at fritz.box), open the “Telephony” menu in the left sidebar, then select “Telephone numbers”.
-
In the telephone numbers page, choose the “New telephone number” button at the bottom right of the list.
-
Fill out the form as follows
-
Set the “Telephony Provider” dropdown to “Other provider”; If you want to later add additional HoIP extensions, you can select the existing provider instead.
-
Set the “Telephone Number for Registration” and “User name” to your Username/Extension from the registration email. You may also want to set “Internal Telephone Number in the FRITZ!Box” to the same value.
-
Set the “Password” to the Password from the email.
-
Set the “Registrar” and “Proxy server” to
<SERVER>:<PORT>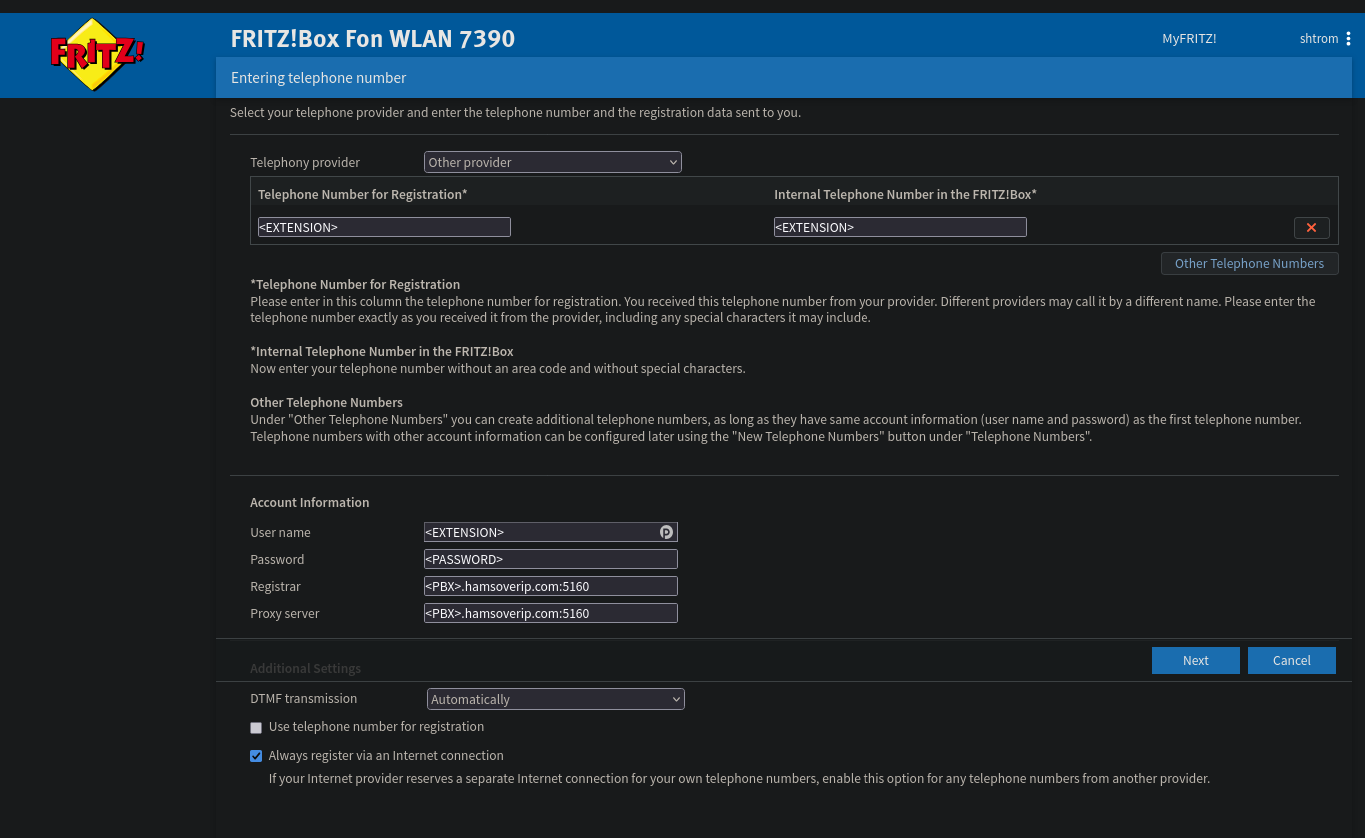
-
-
If all goes well, the next page will test the connection and succeed.
-
Back to the Telephony admin page, you can see the green light next to the account, confirming that it's functional. You can also use the pen icon to edit a few more parameters for the account, but nothing that should be required for it to work.
Last updated 2025-10-26 by Olivier VK7SHM